How to connect Mindray BC-3000 Plus with MedX Automation
MedX Automation connects with the Mindray BC-3000 Plus hematology analyzer using serial communication via the RS-232 port at the back of the machine. You will need an RS-232 to USB adapter cable (or a direct serial cable if your computer has a serial port) to connect the machine to a computer where you have installed the Automation app.
This guide assumes you have already installed the Automation application and added the Mindray BC-3000 Plus. See How to connect medical devices with MedX Automation for more details.
Refer to Configuration of serial port drivers for more information about connecting machines via serial communication
Connecting with a Serial Cable
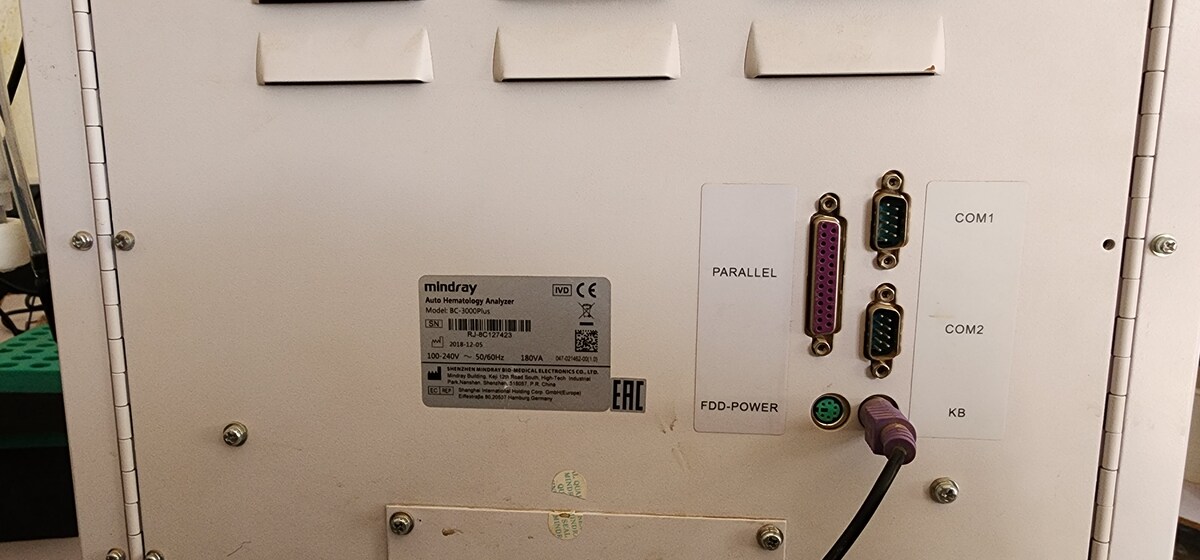
Locate the RS-232 serial port labelled COM2 on the rear panel of the BC-3000 Plus. Connect one end of the serial cable (RS-232) to the machine and the other end to your computer. If your computer does not have a serial port, use an RS-232 to USB adapter.
When the computer has recognized the analyzer, it will enroll the serial port as one of the COM ports of the PC. Please go to Device Manager and check the COM port ID. You might have to install appropriate drivers for it to be recognized. Refer to Configuration of serial port drivers for more information.
Configuring Serial Communication
On the Automation Application
- Click the settings button on the top right and select the serial port corresponding to the cable you have connected. If you are not sure which one it is, unplug it, check which one is no longer in the dropdown, then reconnect and select the one that reappears.
- Once connected, the status should change from PENDING to CONNECTED. You can then proceed to send results from the machine.
On the BC-3000 Plus
Located under Setup > Transmission, the serial communication settings on the BC-3000 Plus must match the following values.
| Setting | Value |
|---|---|
| Baud Rate | 9600 |
| Parity Bit | None |
| Handshake | No |
| Auto Trans. | On |
![]()
Sending Results
To manually send results from the BC-3000 Plus:
- On the machine, navigate to the Review or Sample Review screen.
- Select the sample result(s) you want to transmit.
- Press key 4 to display the Transmit dialog.
- Press Selected to transmit the selected results via the serial port.
- The results should appear in the Results tab of the Automation application.
![]()
Troubleshooting
No data received in the Automation application
- Verify the serial cable is firmly connected to both the machine and the computer.
- Confirm you have selected the correct COM port in the Automation application.
- Ensure the serial settings on the machine match the values in Configuring Serial Communication above.
- Check that the appropriate serial port drivers are installed. See Configuration of serial port drivers.
- Ensure no other application is using the same COM port.
- On Windows, open Device Manager to verify the COM port is listed under Ports (COM & LPT).