How to connect Sysmex XN Series with MedX Automation
MedX Automation connects with the Sysmex XN-L Series (XN-530/XN-430/XN-330) via TCP/IP using the XN-L series ASTM communication format.
You must install the application on a computer connected to the machine via a network. This guide assumes you have installed the MedX Automation application and added the Sysmex XN Series. See How to connect medical devices with MedX Automation for more information.
For more information about interfacing with the Sysmex XN Series, refer to the following manuals;
- Automated Hematology Analyzer XN-L series XN-530/XN-430 /XN-330Basic Operation Manual
- Automated Hematology Analyzer XN series ASTM Host Interface Specifications
- Automated Hematology Analyzer
XN series Administrator's Guide
Configuring Communication
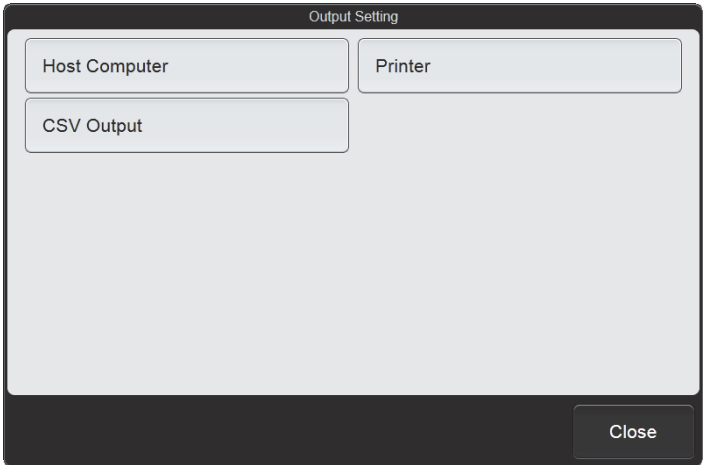
To display the [Output Setting] dialog box, touch the [Output Setting] icon in the [Setting] menu screen. Touch [Host Computer] in the [Output Setting] dialog box.
Select this [Connect to Host Computer] to enable connection to the host computer. This must be selected to configure connection settings. Select [TCP/IP Connection] for the method of communication with the host computer.
Select [Modify Settings] to configure detailed settings for the selected communication method

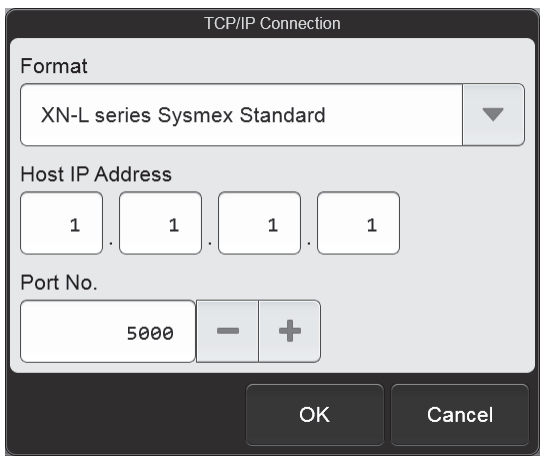
Select [XN-L series ASTM] for the communication
format. Set the IP address of the host computer and port as displayed in the Automation application then select Ok
Sending Results
From the analysis result list in the [Sample Explorer] screen, the analysis results of the selected samples can be
output to various output destinations. Up to 100 samples can be output at once. Follow the steps below to output to the Automation app.
In the cases below, the analysis results cannot be output
- The sample has not been validated.
- The last 10 samples are displayed using [Display]
- The instrument is not connected to a host computer or printer.
Select the analysis results you want to output in the analysis result list.
If you want to output results of multiple samples, change the mode of the analysis result list to multiple selection mode and add select them
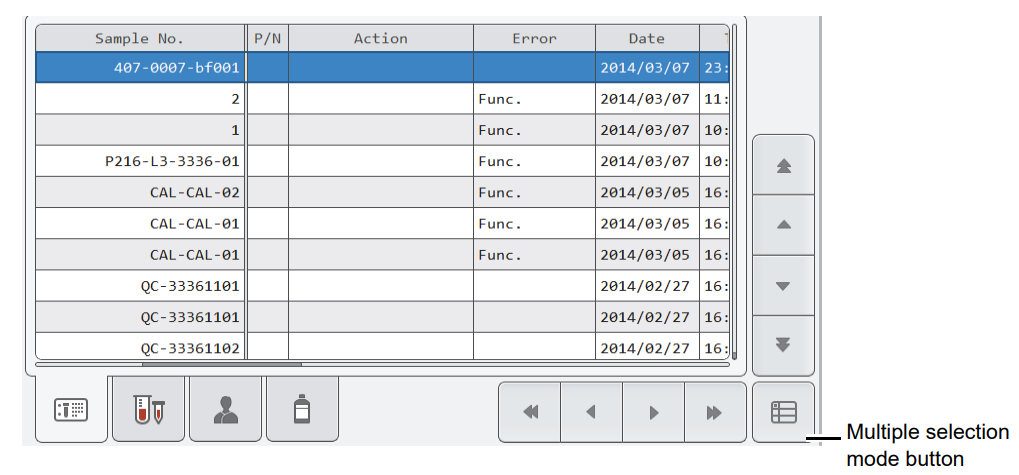
Touch the [Host Computer (HC)] output destination from the [Output] button on the toolbar. Destinations that are not connected are greyed out and cannot be selected.
Auto-sending Sending
Touch [Auto Output] in the [Operational Settings] dialog box. Select the [Auto Output] checkbox to have validated samples automatically output.

Under [Auto Output Setting
Procedure], select the setting method for auto output conditions.
- [Set in rule view]: Automatically output analysis results based on the conditions set on the [Output Rule] tab of the [Rule] screen.
- [Use simple settings]: Automatically output analysis results based on the conditions set in the dialog box that appears when [Modify Settings] is touched.
If you decide to use simple settings, Touch [Modify Settings] after [Use simple settings] has been selected to display the dialog box below
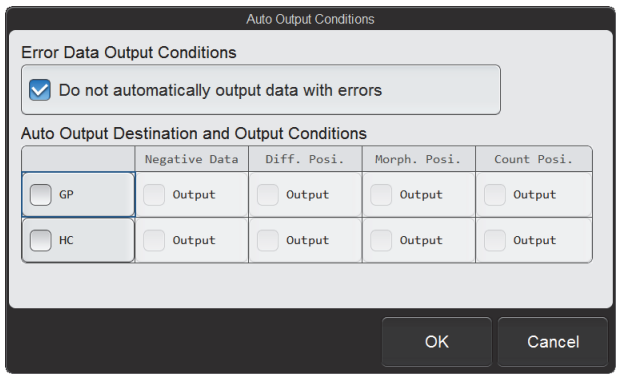
When the [Do not automatically output data with errors] checkbox is selected, data that includes errors are not output to all output
destinations, regardless of the output conditions.
Under [Auto Output Destination and Output Conditions], Select the [HC] checkbox to have data automatically output to the host computer. Configure the rest as follows;
- Select [Negative Data] to automatically output results that have no parameters judged abnormal and no analysis errors.
- Select [Diff. Posi.] to automatically output results with abnormal blood cell differentiation.
- Select [Morph. Posi.] to automatically output results with abnormal blood cell morphology.
- Select [Count Posi.] to automatically output results with abnormal blood cell counts.
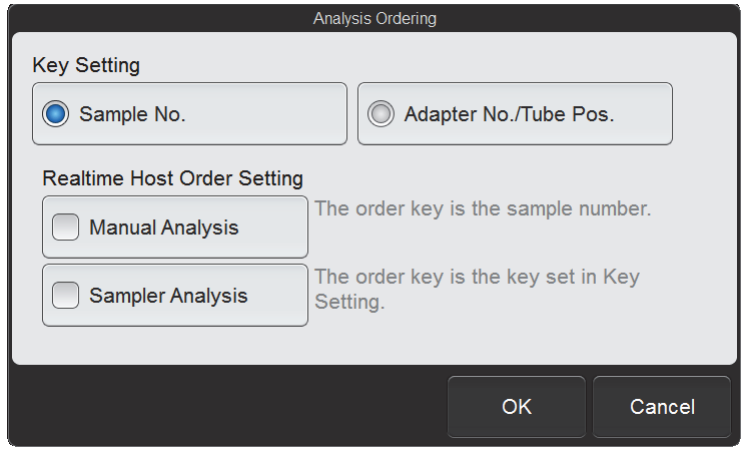
Analysis Host Ordering
At this time, Automation doesn't support bi-directional communication with Sysmex XN Series. Therefore Realtime Host Order
Setting must not be enabled.
- Touch [Analysis Ordering] in the [Operational Settings] dialog box.
- Ensure [Manual Analysis] and [Sampler Analysis] are disabled under [Realtime Host Order Setting]
Troubleshooting Connectivity
If you experience communication errors when outputting results, check that the machine is connected to the same network as the host computer. You can do this by pinging the host computer and ensuring there is a response.
- Hold down CTRL + ALT + DEL on the keyboard and select Task Manager
- In the Task Manager, click File > Start New Task
- In the Run window, type CMD and press enter.
- In the command prompt windows, ping the host computer. For example, assuming the host computer IP Address is 192.168.1.23, run the following command; ping 192.168.1.23
- If you see that the host computer is replying, the connection is likely working fine, otherwise you need to check your network. Contact the network administrator for further assistance.