How to connect Cobas C311 with MedX Automation
MedX Automation connects with the Cobas C311 via serial communication using the ASTM protocol. Additionally, Roche also provides a middleware through which Automation can access results from a network-shared folder. We recommend using serial communication because it provides more capabilities over accessing files from the network-shared folder.
Either way, you must install the application on a computer connected to the middleware over a network or directly using a serial cable. This guide assumes you have installed the MedX Automation application and added the Cobas C311. See How to connect medical devices with MedX Automation for more details on this.
For more information about interfacing with the Human HumaCount, refer to the following manuals;
- cobas c 311 analyzer Host Interface Manual
- cobas c 311 analyzer User Manual
Using Serial Communication
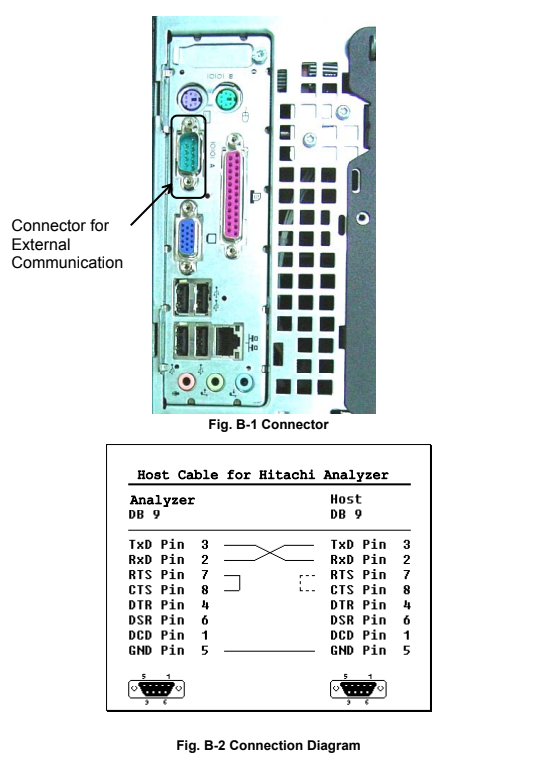
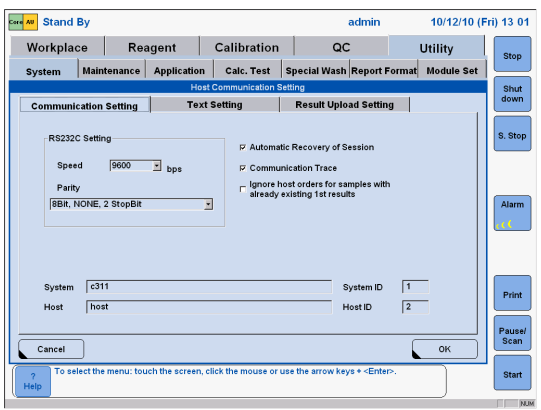
Before proceeding to configure the analyzer, ensure the serial cable is properly connected. Roche recommends, attaching the cable only when the analyzer is turned off. Connect the RS-232C communication cable to the connector at the Cobas c 311 analyzer. The connector is D-SUB9. Fig. B-1 shows the connector and communication cable. Fig. B-2 shows a connection diagram.
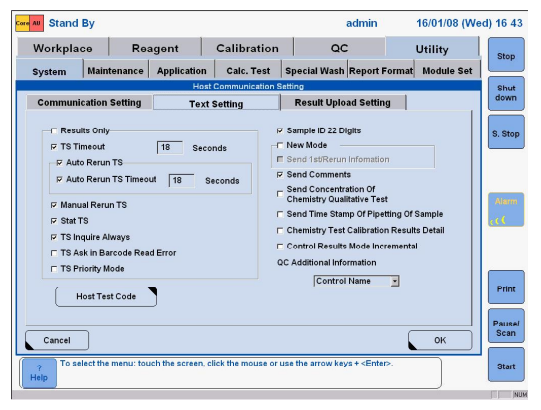
Log in as an administrator on the Cobas C311 to follow the next steps. Go to the Utility tab, select the System tab under it and select the Communication Setting tab under it. Under RS232C Setting;
- Ensure [Speed] is set to 9600bps
- [Parity] is set to "8bit, None, 1 StopBit"
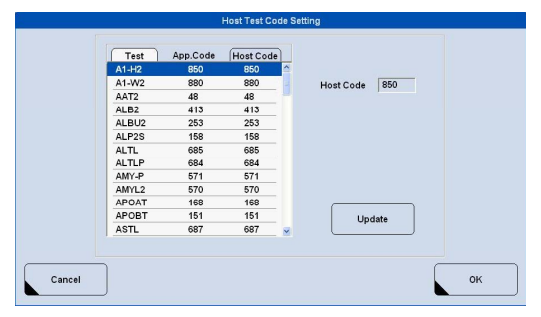
Under the text setting tab, ensure the following are enabled
- Results Only
- Send Timestamp of pipetting of sample
Click the button labelled "Host Test Code", a dialog listing assays along with their codes will be listed. Ensure all assays have a corresponding host code, you can use the code as the app code.
Under the "Result Upload Setting" tab, ensure the following;
- Routine Sample Result upload setting is "By Sample"
- STAT Sample Result upload setting is "By Sample"
- No Automatic Result Upload is disabled
Sending Results
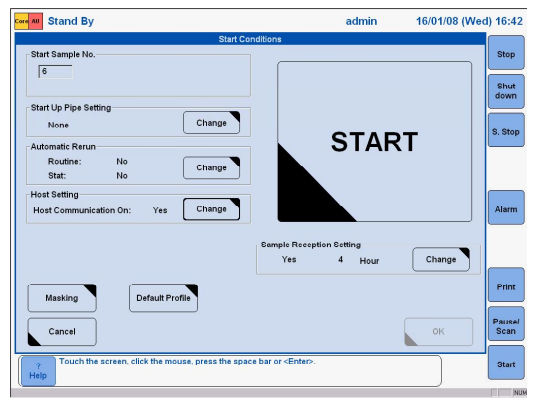
Before sending results, ensure Host Communication is turned on. On the start conditions screen, select "yes" at Host Communication
If you followed the configuration setup, results should upload automatically on completion, however, you can also send results manually using the steps below
- On the results review screen, select the samples whose results you want to upload
- Click the button labelled "Send to Host"